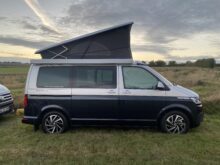
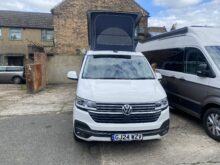
Buying a Volkswagen California
The VW California in its many incarnations is undoubtedly a remarkable vehicle that will provide years of adventure and unparalleled fun. However, regardless of this there will still be things you need to be aware of when considering your purchase. This in-depth six part guide and printable checklist will give you some basic advice for what to look for and what to avoid. Also, be sure to check out our Classified Ads section as you may find your next adventure on this very website.
- Part one covers the elevating roof, water tanks and electrical hookup.
- Part two includes the kitchen area and interior heating
- Part three contains information on the lower living area and privacy blinds
- Part four has information on outdoor camping equipment, including the sun canopy
- Part five tells you about the tailgate storage, toolbox and includes an equipment inventory
- Part six gives you a very brief overview of the technical side of the van, which is largely the same for buying any vehicle
Don’t forget to download our printable checklist by clicking here.
CALIFORNIA BUYERS GUIDE – PART 1
While it is always important to check the mechanical workings and history of any vehicle prior to purchase, for this guide we are focusing mostly on the unique fixtures and fittings associated with the live-in aspects of a Volkswagen California, especially those pertinent to the UK market.
THE ELEVATING ROOF
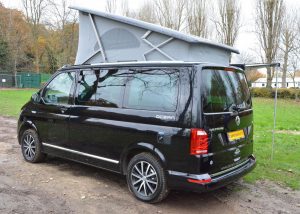
For the electric roof found on the California SE and Ocean, check the buttons and operation of the overhead control panel used to lift the roof, this should operate with the ignition turned on, but there should be no need for the engine to be running. There is an overhead blind that covers the roof bellows for driving; this should slide back and forth smoothly on its runners and stay closed when driving, although from time to time it is not uncommon for this to slide open a few centimetres and require closing again.
For the manual roof found on the Beach (and Coast in the rest of Europe), check that all the clasps and closing mechanisms work and that the roof lifts easily. As with all manual roofs it is possible to snag the bellows with the clips so you may find small holes where where the material has been caught, Also check the spines that stitched in to the bellow fabric as these too can be bent or deformed from poor observation when closing the roof.
Check that the roof lifts smoothly and evenly on both sides; we would suggest checking this more than once.
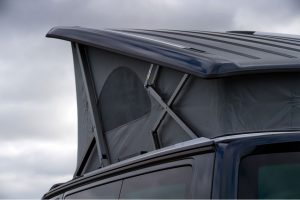 Check that the roof is in alignment when raised, and look for any signs of damage on the canvas, especially behind the metal “scissor” mechanism at the rear sides of the pop top.
There is an area; a type of band or spine that naturally folds inwards when the roof is lowered, and if the canvas has been caught this is usually the place where damage occurs. This is the result of user error and failure to observe the roof bellows closing inwards especially in windy conditions. This is not uncommon, so if there is any damage assess whether you can live with it or not; the damage is usually minimal in this section and only usually affects the outside.
Please note that there are three layers to this section – the outer canvas, the inner plastic band and the inner canvas and it can be patched successfully. If the canvas is caught in other areas then this might be more of a problem and can be used to negotiate a discount.
Check the front band has not been caught, rhus causing a bend low down on the band. If it has this is not a major problem but it may cause the canvas to pop out when closing and require the operator to be more vigilant with guiding the canvas inward.
Check around the join between the canvas and the roof cap to ensure it is not coming away at all, some T6’s have been repaired under warranty for this.
When the roof is open check that the top has not been damaged by racks or surf boards etc. and there are no signs that is has be driven or erected under low hanging branch, barrier or similar.
Look down the profile of the roof sides to check for any kinks or bends. A small kink can indicate the canvas has been trapped regardless of whether damage has been done to the canvas or not. It could also be that someone has closed the roof with bedding or objects still in the top. Most people are happy to live with a small amount of kinking, so it is up to you to decide if this is an issue or whether it has been reflected in the purchase price.
There is a flexible light pole inside the pop top of the T5; Check that it is not loose or broken, that the fixtures are sturdy and the housing on the light are complete. If the halogen reading light has been accidentally left on while the roof closed this could have damaged the clear plastic cover, which can fall out as a result. This is a minor issue but replacing the stem requires a some wiring and could mean upgrading to the new T5 5 LED light (available to buy online). Fortunately the T6 avoids the stalk light completely with the introduction of LED dimmable comfort lighting integrated into the roof.
WATER TANKS AND ELECTRICAL HOOK UP
 Check the electric hook-up point. Check that the flap opens and closes and there is no damage to the connection or panel – for example by driving off while connected to the mains (there is a warning alarm should you accidentally do this). If you get the chance to connect it up, the overhead control panel (above the cab) will tell you whether the hook up is charging the batter by displaying a two pronged – continental plug symbol bottom right. Incidentally a ‘G’ symbol means charging when you are driving.
There are two water tanks; one 30 litre tank for fresh water and one 30 litre waste tank for water collected from the sink. There is a drain handle inside the bottom left of the cupboard — when in a vertical position the tank will hold waste water; when horizontal it will drain the waste tank from a pipe located underneath the bottom sill, near to the rear wheel.
Look for signs of leaking around the exterior of the vehicle. There is another red lever located under the shelf in the rear cupboard of the tailgate (above the gas bottle housing) that you release to drain the fresh water.
Allow some water to go down the plughole to ensure there is no blockage; the water will run out slowly.
Check the tap is secure, that there are no leaks and it works properly. Occasionally a micro switch or water pump could fail, especially if the vehicle has been subject to extreme freezing temperatures.
CALIFORNIA BUYERS GUIDE – PART 2
In this section of our California buyers guide we will be concentrating on the kitchen and food preparation area, along with the comfort of the rear heater.
KITCHEN, COOKER AND FRIDGE
Check that the ignition works on the cooker and there is no smell of gas.
There is a tap just below the hob to isolate the gas, and it should also be turned on and off at the gas bottle when driving (securely housed in the rear). If there is no gas bottle ensure all the fittings and regulators are there to install a new one.
 Check that the fridge works – it is probably a good idea to turn it on when you arrive to ensure it has cooled down by the time you have looked around everything. The overhead display will indicate that the fridge is working by means of an illuminated snowflake icon
Check all fixtures and fittings, doors handles and hinges including those on the pull out table – note that shelf clips can go missing but they also cost pennies to replace. Best to just open all doors, drawers and cupboards. The small plastic washing up bowl can melt while cooking, so don’t forget to check this too.
INTERIOR HEATING
 Operating the independent rear heating is done from the heads up control panel in much the same way as the fridge; there is an icon on the overhead display that illuminates when operational. The warm air is blown from a vent on the door column. There will be a slight smell of diesel on startup, but after this make sure there are no ongoing fumes in the vehicle and that the air is hot. Check that the remote fob to operate the heating is present and works.
HEADS UP DISPLAY AND CONTROL
If you have been following this guide in order, you should have already used this overhead control to operate the roof, the heating system and the fridge.
Having been show all of the features this should highlight any potential problems with unresponsive controls, dead pixels etc.
There is an icon on the left of the display to tell you how much water is in the tank – If the the tank is full check that it says so as there maybe a problem with the sender unit.
CALIFORNIA BUYERS GUIDE – PART 3
Continuing our guide to buying a Volkswagen California, in this section we will be focusing on the rotating captain seats and main living area.
CAPTAIN SEATS AND MAIN BED
Check the swivel seats in the front for any loose trim, this can drop a little and catch on the fixtures as it spins. if the seats have been turned incorrectly there may be scuffing in the door trims and seat columns as we will explain below.
 The armrests on the driver and passenger seats should be checked in case someone has stood on them to get into the top bed.
The door cards on the front can become scuffed in the seats are turned without opening the door or badly positioned – a good tip is to locate the optimal position for swivelling the seat, and marking it with a sticker so that you can line it up in future with minimal fuss.
The bench seat at the rear is released by pulling up the lever to the right of the drawer. Check it slides freely and the stopper is in place to position it correctly.
 Drop the headrests back via the button and ensure the pull-strap is not damaged. We would suggest if the vehicle does not have a sleep pack or mattress topper that you invest in one to give a more comfortable night.
There is a panel in the base, near the kitchen, that comes off to allow storage of long items like skis etc.
PLEASE NOTE. For the Beach with a third seat, we suggest you get a full demonstration of the operation as there is a specific sequence to use this correctly.
Also, for vans with three floor rails there is an option to put a fifth seat on board. You can not have this addition if there are only two rails so if you require a fifth seat then make sure you go for the three rail model.
WINDOWS AND BLINDS  The privacy screens are nearly all different depending on the part of the van and the model year. Pull down all blinds to make sure they all stay down – it’s easy to miss if you don’t know where it is, but there is a small sideways running blind for the window next to the wardrobe. On UK T5 and Beach models, there is a pack of 3 blinds that covers the windscreen and front side windows, it should have a front blind and driver and passenger blind. On the T6 Ocean and older European models the windscreen has a built in blind that extends over the dashboard, and as such the pack will only contain blinds for the front side windows. Pay special attention to the blind above the sliding door as it can become accidentally bent from people climbing in and out and bashing their heads. Operate all windows to ensure they all open and close correctly – the rear windows operate by pinching the middle catch together.
CALIFORNIA BUYERS GUIDE – PART 4
In this, the fourth section of our VW California buyer’s guide we will spend some time looking at the provided tables, stowaway chairs and optional roll-out sun canopy.
TABLES
There are two tables with the California. The inner table, stowed next to the kitchen units and a larger removable table that fits into the sliding door.  Check this moves freely, the leg is secure, look underneath especially at the rivets to ensure no weight has been applied to the table.
For the inner table there is an included strap that hooks around the head restraint to turn the kitchen area into an L shaped work surface – check that this is included. If it is missing a new table strap can be replaced relatively simply.
There is an outdoor table that is stowed in the sliding door. Check that the ledge it sits in is firm and has not been stepped on or scuffed. Open the table to check that it has a levelling screw for uneven ground on one of the legs, and that the legs clip open and close smoothly.
TAILGATE STOWAWAY CHAIRS
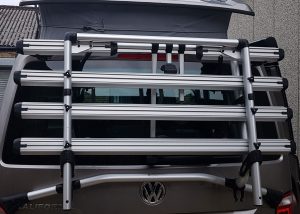
 In the tailgate there is a zipped compartment for stowing chairs. Check this holder that the chairs are there; check the zips and rings that hold the seats in place. Take the deck chairs out and open them and check for wear and make sure that all the bolts are in place and tight – these do work loose and so we recommend you tighten every once in a while.
ROLL-OUT SUN CANOPY
If included, check that the winder and pegs are with the vehicle. Unwind about 45cm and bring the legs down for support. Then wind the canopy out to its full span. Check the legs and the fittings, check the canvas for stretching and tears.
 See that everything winds out and in reasonably smoothly and that the legs lock into position. Check that the tent pegs are still in place, but if not they can be replaced relatively cheaply.
When winding out the canopy the handle and legs can knock against the bodywork – be careful when doing this by positioning your arm between the bodywork and the handle – and check for scuffs and dents that you might not otherwise notice.
CALIFORNIA BUYERS GUIDE – PART 5
In this, the fifth section of our VW California buyer’s guide we will focus on the positioning of the toolbox and the shower sometimes found below the rear parcel shelf. We also include a checklist of included and optional camping / comfort equipment.
REAR PARCEL SHELF AND BOOT AREA
 Chances are that there will be a degree of wear and tear around the boot area – make sure that this is at an acceptable level. Check that the parcel shelf / bed frame can be removed and moved up to or down to the next level as the fixtures for this can suffer a few knocks.
One thing to be aware of is that the rear cupboard shutters can sometimes split, and while they may sometimes be repaired under warranty, this may not be available for all vehicles.
Whilst in the back you should also check the mattress for any signs of damage, and also (depending on options) check that the rear shower is present and working.
Fitted to the rear bench / bed and accessed from the bottom rear is the toolbox. Check the contents for Jack, Screwdriver, Centre Cap remover, Wheel brace and locking wheel nut key. Depending on options there is also a shower attachment stored under the shelf above the gas bottle – check that this fits into its bayonet mount correctly, switches on and operates properly.
ITEM CHECKLIST
Other items you may have with the vehicle as standard (depending on options).
- Two sets of Keys
- Remote Heating Fob
- Water Cap Key
- Handbook/Roadside Assistance Book/ Service Book
- Cutlery Insert
- Emergency Roof Strap
- Table strap
- Plastic sink bowl
- Sink Plug
- Fridge Basket
- EU hook up Lead
- Sun Canopy Winder
- Four Tent Pegs
- Curtain/Blind Pack
- Mosquito Mesh for Sliding Window
- Rear Mattress
- Top Bed Mattress
- Top Bed Safety Net
- First Aid Kit
- Warning Triangle
- Gas Fittings
- Toolkit
- Locking wheel nut
There maybe other extras sold with the vehicle that are not listed above, and you can always download our multi-point checklist that is linked above.
We would recommend going to your main dealer or a big Camping and Caravanning Show to check out a new California to see what the vehicle entails and whether it suits your needs, and to use this demonstration as your guide to inspecting a used vehicle.
One of the best ways to get to know a campervan is to hire first; a test drive and demo won’t let you get a feel for what it would be like to live in a 5m by 2m box for any extended period. If you do choose to hire, then we highly recommend you read our article on choosing a hire company.
CALIFORNIA BUYERS GUIDE – PART 6
While it is always important to check the mechanical workings and history of any vehicle prior to purchase, for this guide we have focused mostly on the unique fixtures and fittings associated with the live-in aspects of a Volkswagen California; this final addendum gives a brief overview of what to look for mechanically when buying second hand.
ENGINE AND MECHANICAL
 There really is no reason to buy a T5 or T6 California without a full service history. People love these vans and tend to keep them serviced and looked after for many years. If there are missing stamps in the book then this may be evidence of neglect at some point.
The T5 and T6s are very resistant to rot, even around common areas. If it shows signs of rust then do not be scared to walk away, even if the vehicle is relatively new — there will always be other vans to choose from.
There have been some reports of bubbling paint around the perimeter of the elevating roof, and although VW agreed to repair vans up to 6 years old under their warranty, this rare issue is something you should check for on the off chance it was missed.
Listen out for any vibrations when it’s running a T5 as the dual mass flywheel is prone to failing; do not worry so much about vibrations from the camping interior as this typically contains a lot of equipment. The steering column in the T5 has also been reported to knock – this does not affect all T5 vans, but beware when buying an older second hand model.
There have been reports of problems with the older bi-turbo engines – apparently there has been an oil pressure issue with this engine, that is also sometimes evidenced by a loud knocking noise.
As with all vehicles, everything will be subject to wear and tear, and there may be issues we have missed through oversight or changes to spec. As such it is always best to have a suitably qualified professional with you when going to view any potential purchase.
